a quick salad for dinner.

poached chicken saladOkey, I know it doesn’t look like much (this was a very quick photo because I was hungry and wanted to eat!) – but this was a pretty delicious dinner.

First, I poached a couple boneless, skinless chicken breasts in a broth made with one lemongrass stalk, a toss of green cardamom pods, a few slices of fresh ginger, a spoonful of sugar, and a sprinkle of salt.  The lower the heat, the smoother and more tender the chicken, so I just let the broth blip lightly for about 20 minutes.

While the chicken was blipping, I assembled the salad: leaves of baby spinach and arugula, orange slices, almond slivers, blanched green beans, and homegrown alfalfa sprouts.  The black sesame dressing recipe was this one with an additional tablespoon of nutritional yeast to make it creamier.

When the chicken was done, I let it cool on a plate before pulling it into pieces and tossing it with the rest of the salad.  There was too much chicken, so the next day I made sandwiches with the leftovers.

It has started to warm up a bit (-15 C, yee ha!), and this was a light, but satisfying dinner to encourage spring to arrive.


spring is in our kitchen!

Or at the very least, spring onions (also known as green onions or scallions, if you please).  In an effort to encourage growth and new things and all that fun spring-y stuff, I attempted to plant a bundle of organic green onions that I picked up from the grocery store!  I made sure to choose ones that still had their roots intact.  I booted it home, cut off the tops to leave about 2 inches of green onion above the root, and planted them in soil.

A good watering and 24 hours later, this is what it looked like:

green onion growth!You see how the middle rings of green onion are longer than the outer rings?  That’s growth, baby!

Fingers crossed that the roots develop and we get a nice little crop of green onions to snip at every so often.  If this goes well, I might try some other supermarket favourites, like lemongrass and parsley.

Yay to cell division and elongation!

holiday food!

Last week, we decided to skip town for a few days to hide in a cabin and find some peace and quiet.

winter prairies

It has been a long prairie winter thusfar with no definite end in sight, but while we are buried under our layers in an effort to stay warm, we might as well enjoy it!  The snow’s crisp whiteness is beautiful and refreshing, like looking down at a blank piece of paper on a desk.  All those layers (thick scarf, toque, hood) muffle external sounds, leaving one blissfully unaware and able to ruminate uninterrupted.  Winter is a good time for inner reflection and brooding; a mental reset before charging ahead when the temperatures rises.  When the wind is blowing I sometimes feel like I’m inside an Etch-and-Sketch that is being vigorously shaken by a 5-year-old, but I remind myself that clearing the slate makes way for new things.

After long walks through the snow, it is important to warm up again from the inside.  Moreover, as this was a holiday, there was special food, and in my books, holiday food is synonymous with one word:

Bacon.

!!!!!

I don’t like cooking bacon regularly: it is messy, somewhat dangerous (grease splatter, oweee!) and leaves me feeling rather fatty and salty (read: sluggish and thirsty), so it is best relegated to the category of Special Food.  Plus, once I have a taste of it there is no stopping until it is all gone, which is very regrettable for the rest of the day.

This time I took some inspiration from Mr. Elvis Presley, as apparently his favourite meal was a toasted peanut butter, bacon and banana sandwich.  Lacking a banana, I decided to use a Royal Gala apple instead.  It was all very fantastic, particularly because of the bacon.

pb bacon apple loveI might relax my “Bacon = Special Food” designation and have it perhaps for a Tuesday morning breakfast – sometimes, you need to take a random day and make it special.  Besides, a day that starts with bacon is automatically a good day, and couldn’t we all use more of those?!

polenta: baby food for grown-ups.

I have had a large jar of cornmeal sitting in the pantry for over a year.  It makes periodical appearances, usually when I am making pizza and I need to dust the baking sheet with it.  Sometimes I think I will make corn bread, but it never seems to happen, because corn bread without bits of bacon in it is pointless, and usually I don’t remember to save a strip of bacon on the rare occasions I have it, because I’m busy gobbling it up and smacking my lips.

But then one weekday lunch hour, I remembered: polenta!

I don’t think there is a huge difference between corn meal sold as “corn meal” and corn meal sold as “polenta,” though I imagine that can vary depending on brand.  Polenta is basically porridge made from corn, and as easy to make as oatmeal.  With a generous dab of butter and a sprinkle of salt, it is a super fast and easy component of a delicious meal – and comforting!  It slides down smooth and keeps you warm during your afternoon nap.  Alongside we ate zucchini roasted with olive oil, and a pesto of broiled red peppers, walnuts, parsley, a dry old hunk of Parmesan and more olive oil.  We used some crusty sourdough to wipe the plates clean.  Look ma, clean dishes!

polenta lunchPolenta

Bring one cup of water to boil in a small saucepan.  Add half a cup of cornmeal, and stir with a spatula, scraping the bottom and sides of the pan.  If the polenta seems too thick, add splashes of water.  When the little grains of cornmeal seem puffed up and a little translucent, it is done.  Take it off the heat and stir in a good-sized blob of butter and a sprinkle of salt.  This makes about 2 servings.  It is quite filling, so each person doesn’t need too much.

Next time, I want to make a beef brisket or a juicy steak and serve it with roasted veggies on a fluffy bed of polenta.  Mm hm.

Red pepper walnut pesto

Cut 3-4 red peppers in half and de-seed them.  Place them cut side down on a baking sheet and broil them in the oven until the skins are completely black.  Tip them into a bowl and cover with a plate or plastic wrap; this steams the peppers so it is easier to peel off the blackened skins.  Meanwhile, toast a good handful of walnut pieces in a heavy pan on the stove, stirring occasionally so they brown evenly.  When the peppers are cool enough to handle, peel off the skins and toss them into a blender or food processor with the walnuts, a generous bunch of parsley, and a hunk of Parmesan that is double the size of your index finger.  Add a glob of olive oil, and pulse/blend until it reaches your desired consistency.  (We just got a Vitamix and since we are in love with it, everything has been blended into submission for the past little while).  This makes more than you need for a single lunch, so store the rest in a jar in the fridge for up to a week.  Try it tossed with pasta or stirred into rice.

gomae!

Gomae!  My new war cry!

But also the Japanese word for a side dish of vegetables and sesame dressing.

Gomaaaaeeee!!!

I first ate gomae during a lovely party held at a Japanese restaurant a few weeks ago.  It was a terrific and well-timed discovery, as I had just bought a gigantic, 1 kg bag of roasted black sesame seeds.

Hubba hubba:

a lot of black sesame

I had no specific intentions for the seeds, except to eat them, and this is a pretty tasty way of eating them!  Black sesame has a tantalizingly rich but delicate flavour that lends itself well to both savoury and sweet dishes.  If you are skeptical, this dish is a delicious place to start – usually you see this dressing made with spinach, but I didn’t have any and improvised with the contents of my fridge.  It makes a light and simple weekday lunch, or can be an accompaniment to a larger meal.  Enjoy!

Beet and rainbow chard gomae

makes 2-4 servings

1 bundle of rainbow chard
2-3 beets, boiled and peeled
6 tbsp toasted black sesame seeds
6 tbsp mirin
1 tbsp sugar (optional)
2 tbsp tamari/soy sauce

Chop the rainbow chard into 1 cm long bits and steam.  Meanwhile, dice the beets and put them into a large bowl.  When the chard is cooked, add it to the beets.  Blend the sesame seeds (you can add some mirin to help keep it moving) and then mix everything together.  This can be done with a ton of different dark green leafy vegetables (e.g. spinach, kale, arugula…).  Spinach is more delicate in flavour, so the dressing probably doesn’t need the extra sugar to match the intensity of the vegetable, but go with your intuition.  Serve at room temperature.

beet and rainbow chard gomae

Leftover dressing can be stored in a jar in the fridge for 5-7 days.  Relive the glory!

gomae dressing!

wontons: wrapped, unwrapped.

When I was growing up, we would often eat out, Chinese style, for Sunday lunches.  My parents would take my groggy brother and I to loud, gritty restaurants (loud/gritty = better food, naturally), and slouching in cracked vinyl chairs we would order giant bowls of steaming noodles and dumplings.  Everything set before us would swim in light, delicious broth; these were meals of great comfort that would lull us awake, but keep us sedated and calm enough to not worry about Monday morning.

Making wontons at home is definitely a longer process than going to a restaurant and waiting for a waitress to plunk a bowl of them in front of you, but if you have the time and patience, it is worth it.  Moreover, there is a very meditative quality to the repetitive actions of filling and folding the wrappers…before long, you will become one with the wonton.

If you are short on time, an equally delicious alternative is to make little patties out of the wonton filling and fry them – this is a supremely excellent way to consume pork and shrimp, oh yes indeedy.

wontons in the making

Pork and shrimp wontons

makes 30-40 wontons, depending on how much you try to stuff into each wrapper

1 lb raw, peeled, de-veined, de-tailed shrimp
1 lb ground pork
a generous splash each of soy sauce and fish sauce
a good shake of ground garlic
a healthy sprinkle of sugar
a little bit of grated fresh ginger
a tsp or so of corn starch
1 package of wonton wrappers, thawed

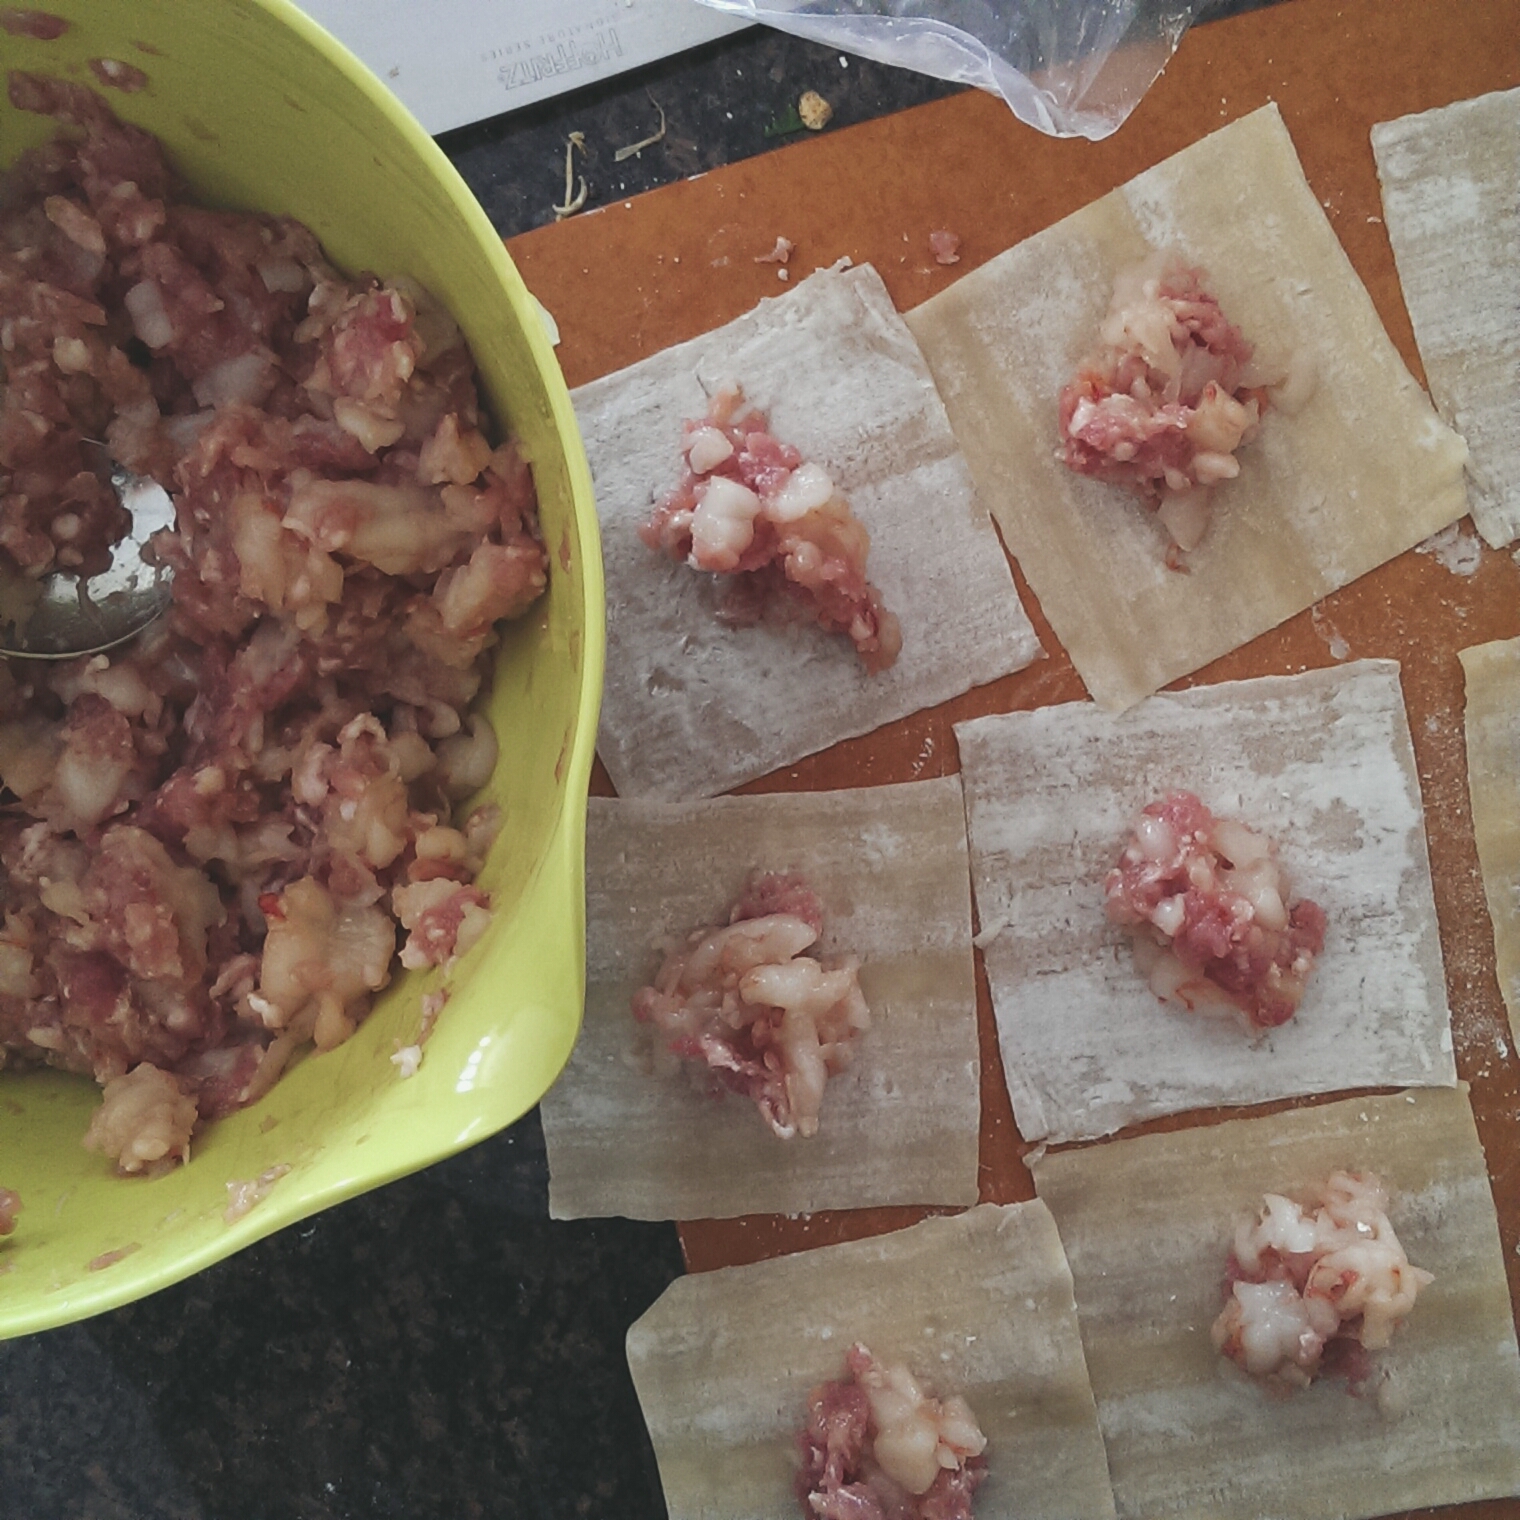
Finely chop the shrimp.  Mix everything together in a big bowl (this is fun to do with your hands!).  Next, set up your assembly line: having a little bowl of water close by, lay out about a dozen wonton wrappers.  Plop a teaspoon of filling into the center of each one.  Dip your finger into the water, and wet two adjacent edges of the wonton wrapper.  Fold the wrapper in half to make a triangle, and pinch the edges shut.  If you can, squeeze out any air pockets.  Take the two far edges together and pinch together.  Now the wonton looks like a little chef hat, sort of like this:

wontons ready to cookContinue working in your self-imposed sweat shop until all the wrappers or filling are used.  Freeze wontons in layers of wax paper for eating later if you like.  When you are ready to eat them, drop them (without thawing) into boiling water and cook until the shrimp turns pink, maybe 5-10 minutes.  It is best to avoid overcrowding the wontons in the water so they don’t stick to each other.  Serve in a light chicken broth studded with diced green onion.

That is how you make wontons, wrapped – yay!

If you are unorthodox and go unwrapped, mix together the wonton filling, and then form into patties of 2″ diameter.  It might be nice to add some minced cilantro or green onions, but only if you care enough to.  Fry in vegetable oil over medium-high heat until browned and cooked through.  Yumyumyum!

Ooh, perhaps you could serve the wonton patties in a big leaf of iceberg lettuce.  Then they would still be wrapped, but very nouvelle.  Hm…I think I know what I’m having for dinner!
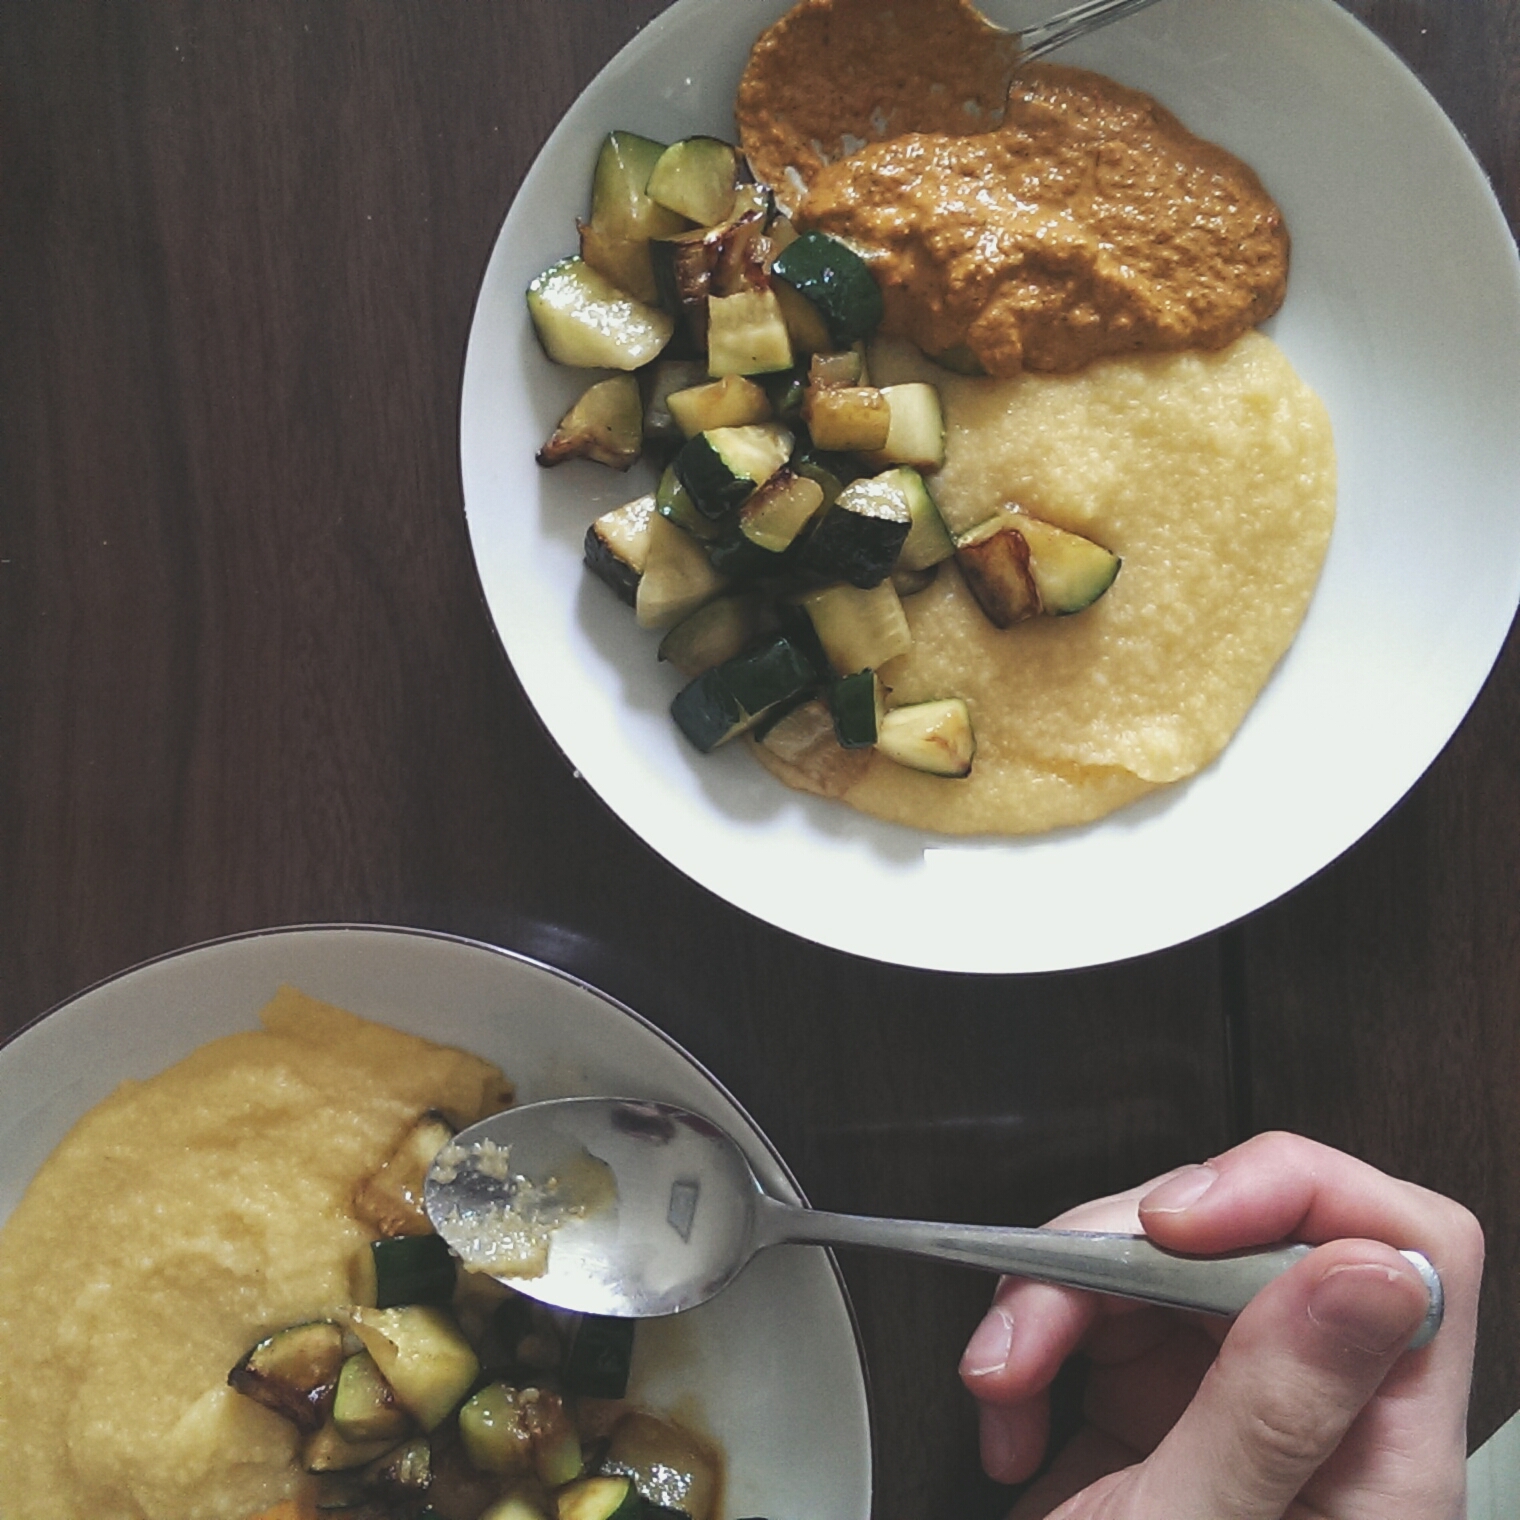
ways to unplug.

There are many ways to unplug when you are stressed out.  For instance:

– turn off your cell phone
– take a hot bath
– listen to smooth jazz
– take a laxative
– eat some fibre

Har har har!  Ah yes, you can unplug, or you can unplug.  Sometimes those inner tubes need a little help, no?  Everyone gets stressed and everyone gets constipated, so I think we ought to loosen our belts a little and talk it out, nothing to be ashamed of.

What helps me maintain a steady flow in life and Down Under is to eat things that make me happy.  Happy mind, happy body.  These blueberry bran muffins fit the bill, because they are tasty, and also help keep things rolling.  Two benefits in one little round mound of fun!

This recipe is based off one in Dan Lepard’s Short and Sweet: The Best of Home Baking.

Blueberry Bran Muffins

makes 12-16, depending on how big you make’em

1 cup milk
1-1/3 cups wheat bran
1/2 cup brown sugar
1 tbsp fancy molasses
2/3 cup sunflower oil
2 eggs
1-1/2 cups all-purpose flour
1 tbsp baking powder
1 tsp ground ginger
1/3 cup white sugar
about 2 cups fresh or frozen blueberries

Heat the milk until it almost boils.  Pour it over the bran and brown sugar in a large mixing bowl.  Beat until it is smooth and mushy, and then let it sit for 5-10 minutes so the bran can absorb the moisture.  This is a good time to preheat your oven to 400 F, drop paper liners into your muffin tin, and turn up the volume on that smooth jazz.  To the bran mixture, add the molasses, sunflower oil and eggs, beating until smooth.  Sift over the flour, baking powder, ginger and sugar.  Fold everything together gently, and then fold in the blueberries gently too.  Spoon the batter into the muffin tin, and let the batter sit for about 10 minutes.  Someone once told me that muffins will rise better when you let the batter sit before baking, and they ballooned up nicely this time, so I think it is worth the extra wait!  Bake the muffins for 25-30 minutes, until the tops are lightly browned.  Let cool on a rack.  Eat with generous dabs of butter, and perhaps some blueberry jam, because too many blueberries is impossible.

blueberry bran muffins portrait of a muffin

another way to soba.

Sobasoba!

Here is another way to eat soba noodles, this time out of broth, not hot, but still delicious.  I like how soba noodles are robust enough to soak up a dressing without going limp, but still tender enough to blend lovingly with other ingredients.  Yes, soba noodles are a good thing.

This is a Japanese-inspired dressing to toss your soba in.  Feel free to add whatever cooked vegetables tickle your fancy – this time I did kale, carrots and bean sprouts, but I’ve also done corn, cilantro and slivers of red pepper…everything will get happily acquainted in the dressing.  Bits of cooked chicken or curlicues of shrimp would go well too.

Sesame Soba Noodle Salad

makes A LOT

3-4 bundles of soba noodles (you know how in a package they bundle the noodles with strips of paper?  Yeah, those bundles.)
1 bundle of kale
3-4 carrots
1 handful bean sprouts
some cilantro, parsley, or green onion, if it tickles your fancy

Dressing
(This is where it gets tricky: I have never measured anything that went into this dressing, obviously, so everything listed below is prefaced with “approximately” – that means that you should feel free to tinker with the quantities to suit your taste.)
1/3 cup tamari/soy sauce
1/3 cup rice vinegar
1/4 cup fish sauce
1/3 cup mirin (or 3 tbsp sugar)
1/4 cup sesame oil
1/2 cup mayonnaise
1 tsp finely grated fresh ginger
a good handful of sesame seeds (white or black)

First, begin with boiling the noodles in plenty of salted water.  Meanwhile, deal with the vegetables: julienne the carrots, rip the kale leaves off the stems (discard stems or use for something else), and roughly chop the bean sprouts into 1 inch lengths.  Heat a small tablespoon of vegetable oil in a frying pan, and toss in the carrots and kale.  Stir occasionally, adding a splash of water to help the carrots to cook.  When the carrots are tender but retain a slight bite, remove the pan from the heat and stir in the bean sprouts.  By this time the noodles are probably tender (10 minutes or so), so drain them and rinse in cold water.  Tip the noodles and vegetables into a large mixing bowl (as well as the cilantro, etc. if using), and pour over the components of the dressing.

Now, here is the most important part of this whole process: the best and most thorough way to mix everything together is with your hands.  Get right in there and squidge the noodles between your fingers to make them shorter so it’ll be easier to dole out to your guests when you use something civilized, like tongs.  Imagine you are shampooing the tresses of some fairytale creature.  Mixing noodles with your hands is a sensual experience with a tinge of vulgarity, and should not be missed.  Best to do this when you are alone in the kitchen, so you can fully appreciate the moment without interruption, or the detracting comments of those hinged on hygiene.

I think this tastes best at room temperature, which is what it will be after you mix everything together.  It lasts very well in the fridge, making it an excellent candidate for a packed lunch.  Garnish with an extra sprinkle of sesame seeds, and enjoy.
soba soba